Saturday, October 29, 2011

Halloween: It's a (tacky) culture AND my costume + PikaDarko


What, bitch? Can't you see I'm texting? Photos by Brenna Zedan.

Yep, it's been a while, yet again. Luckily for anyone attempting to follow my blog, I CANNOT allow Halloween to pass without a post.

This year I am dressed as an Ugg boot wearin, giant-purse-with-tiny-dog carryin, hair straightenin, bronzer wearin, tasteless bitch. I didn't really make anything for this costume, but I did pay a LOT of attention to detail, down to the pink, vanilla flavored lip gloss and bubblegum (which I can't stand the flavor or smell of, but I'm being really method with this character). I'm also terrible with makeup as I tend not to wear it, but that seems to be juuuuust right for this look.


What I DID make was an intentionally creepy and janky Pikachu costume. I could not have anticipated just how creepy or janky it would actually be, but I'm happy with the results. Hopefully Victor will be too, as he is the one who must wear it. I used a huge yellow terry cloth t-shirt as the base for the tunic, adding stripes, a (highly problematic) tail and dangley little feets. Then I got a plastic rabbit mask and painted it like a Pikachu face, which makes for an eerily realistic Pikachu, and seems to remind everyone who sees it of Frank the rabbit of the apocalypse, from Donnie Darko.


This bitch was my best friend back in elementary school, but then she turned into a gothy ho bag, so obviously I can't be associated with her.

Thursday, August 11, 2011

Oh sheet....

I finally got around to making this dress that I've been meaning to make. I think I've been procrastinating on this project for about six months. The project itself took about 6 hours. This is pretty typical for me. I've been wanting to make something with the space print sheets I had as a kid. Since the 1960's concept of the future is my favorite future aesthetic, I figured it would be best to incorporate that aesthetic into this dress.

A few of my favorite 1960's dresses are simple, a-line designs, which are completely devoid of waistlines. On is actually a ridiculous nightgown, but that's besides the point. The point IS that I enjoy wearing these styles with a belt, as shapeless garments aren't particularly flattering on me. I also like that the belt is gauranteed to fall at my real waist (I have a long torso, so sometimes this is a problem with more fitted dresses) and creates a nice gathered effect which is highly adjustable. It is therefore convenient that this 60's tunic pattern fell into my lap. I'm pretty sure that in the future everyone wears tunics. With belts.

I used a hand-me-down pattern for a somewhat shapeless tunic from 1968. It was blurry. Definitely not my camera or photography skills at fault here.


I wanted to keep the top sheet for laying-in-grass purposes, so I had to flatten out the fitted sheet by removing the elastic and opening the seams.


As my mother likes to remind me, ironing is an inherent and annoying part of sewing.


I did modify the pattern a little. I saw no reason to cut out two back pieces and sew them together, so I just took out the seam allowance and cut it as one piece (for those of you who don't sew, this is done by folding the fabric in half and placing the center line of the pattern on the fold).


Darts. I love them so.


I haven't followed a pattern in a while, so something got a little off with the neck and shoulder facings.


And it's done! Or is it...


Better put a belt on it. I like to scrunch the extra fabric in the front and the back, keeping it relatively flat on the sides. Good belt wearing technique is important.


And the back view. This photo makes me realize that while I've gotten pretty good at trimming my own hair, I need a friend to add some layers to the back.

Saturday, July 16, 2011

Because my mother wonders when I'll update my blog...

Today I bring you everyone's least favorite tool, the jeweler's saw! I'm actually a huge fan of it, but I tend to have more patience for meticulous tasks than most normal people do. It's great because it's simple and inexpensive, and you can make incredibly intricate designs with it. Today I'll be making a Wu-Tang headbadge for my friend's bike (see my previous post involving my bike for an example of another homemade headbadge). It's a quick and easy project, but you can get as elaborate as your patience allows.


To get started, draw your design on paper, and stick it to your sheet metal (I'm using a scrap of brass) with rubber cement. Remember to let it dry completely so that the paper doesn't start sliding around.


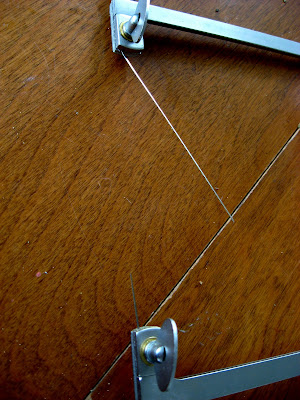
This is the saw. Note that the blade is about the width of a strand of dental floss. The teeth only work in one direction, so when you put the blade on your frame you want to make sure that the teeth are pointing towards the handle.


Starting from the outside edge, begin sawing in towards your design, keeping the blade perpendicular to the metal. Once you get to your outline, you're basically tracing your drawing with the blade. Remember that the saw only cuts when you're pulling down. The trick to smooth curves and tight corners is to keep the saw moving constantly.

If you're trying to cut out the inside of a design while leaving the outside in tact, you can use a drill to make a hole in the middle of your design, then thread the saw blade through and attach to the frame.


You will go through some blades. It can be startling when they break, but it's normal. The more practice you have, the fewer blades you'll break. Again, keeping the blade in motion and at a 90 degree angle to your work will help immensely.


Once the design is all cut out you can sand/buff/shape/patina/basically do whatever you want with it. Hurrah!

Thursday, April 28, 2011

A quick one.

In the interest of actually updating from time to time, I bring you... THE BAMBOO SCAFFOLDING FIASCO!

So I have this vine, which is a very lovely passion flower vine, which is NOT supposed to be an indoor vine, due to its ridiculous rate of growth during the summer. Last year it grew about 12 feet in two months, and I kept having to tie strings to various parts of my ceiling to allow its continued growth. As my ceiling is very high and I don't have a ladder or enjoy heights, I decided that before we get too far into this year's growing season I'd build it something more low-maintenance to grow on. Something made of cheap and easy-to-locate materials. Something like... a grid made of string and bamboo.

Now, on to photos before this gets any more lack-luster:


The vine, looking a bit wistful. Yes, wistful.


Very basic materials. You get no process shots. This is good enough for the likes of you.


And it's done, as if by cooking show magic!


Wednesday, January 12, 2011

More Sketchbook Project, plus new tattoo


My new tattoo, a cover up (in progress). By Greg Hastain.

And now more from my sketchbook (three days remain...)


Wednesday, January 5, 2011

Sketchbook Project


The Mournful Cry Of Joose


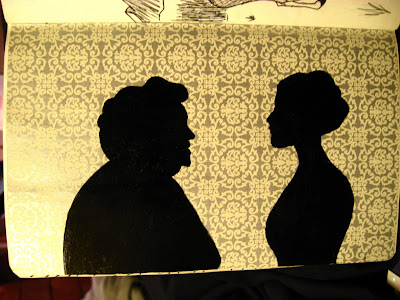
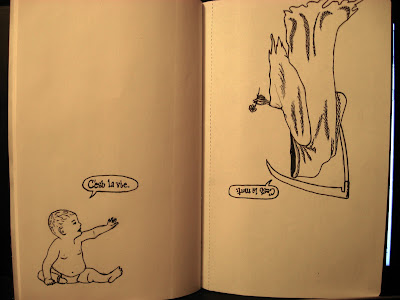
So I've been working on my submission for The Sketchbook Project. Of course, I am slow, and have ten days left, so it's going to be a bit of a struggle to get it mailed in time. A lot of it is going to be pretty embarrassing to submit, but I figure the odds of anyone actually paying much attention to it in a mass of other books are pretty low. These are some of the pages I'm more into.


Centaursaurus Rex


Now What Have I Done With Tinkerbell?